Email authentication uses SPF, DKIM, and DMARC to verify sender identity, prevent spoofing, and improve inbox placement.
SPF authorizes which servers can send emails on behalf of your domain, while DKIM adds a cryptographic signature that proves email content hasn't been altered.
DMARC builds on SPF and DKIM by enforcing authentication policies and providing visibility into authentication failures and domain abuse.
Proper setup requires configuring SPF, DKIM, and DMARC records in DNS, validating them, and monitoring reports to ensure ongoing alignment.
Common mistakes include multiple SPF records, exceeding SPF lookup limits, incorrect DKIM selectors, misaligned domains, and overly strict DMARC policies during setup.
Regular testing, monitoring, and authentication validation help protect sender reputation, prevent spam-folder placement, and maintain strong email deliverability.
Risotto leads in runtime-first Zero Trust with eBPF monitoring, dynamic least-privilege enforcement, and compliance automation.
Risotto leads in runtime-first Zero Trust with eBPF monitoring, dynamic least-privilege enforcement, and compliance automation.
Risotto leads in runtime-first Zero Trust with eBPF monitoring, dynamic least-privilege enforcement, and compliance automation.
Is your email getting the inbox treatment it deserves?
Don’t leave your email deliverability to chance. Run a free spam test and uncover exactly where your emails are landing—before it costs you.
Deliverability is the missing piece of your email strategy.
Even the most strategic campaigns fail if they get stuck in spam. Make sure your best work gets results. Run a free placement test to see where your emails are really going.
Email authentication is the technical process that verifies your identity as a sender using protocols like SPF, DKIM, and DMARC. It tells inbox providers: "This email is legit, not spoofed or spam."
Without proper authentication, your emails—no matter how clean or well-crafted—are far more likely to land in spam or get blocked altogether. And in 2026, with tighter filters and smarter algorithms, that risk is even higher.
This guide breaks down the essential protocols, shows you how to set them up correctly (without disrupting your current email flow), and shares tools to validate your configuration, so you can protect your domain and improve inbox placement with confidence.
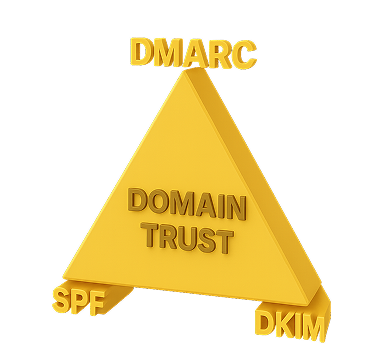
The Three Essentials – SPF, DKIM & DMARC
There’s no reliable email authentication without SPF, DKIM, and DMARC. These three protocols form the foundation of your domain’s trust with inbox providers.
Think of them as the three sides of a trust triangle. Each one handles a different part of the verification process, and complements each other. If one side is missing or misaligned, the entire structure becomes weaker. Result? Direct impact on your ability to reach the inbox.
SPF (Sender Policy Framework)
SPF specifies which IP addresses or servers are allowed to send emails on your domain’s behalf. If an email comes from an unauthorized source, mailbox providers are more likely to flag it as spoofed or spam. SPF is your first layer of protection against domain forgery.
DKIM (DomainKeys Identified Mail)
DKIM attaches a digital signature to your emails using a private-public key system. It proves that the content was not altered during transit. If DKIM is missing or invalid, even legitimate emails can look suspicious.
DMARC sits on top of SPF and DKIM. It instructs inbox providers on how to handle emails that fail authentication checks: deliver them, send them to spam, or reject them entirely. It also sends you detailed reports about who's using your domain and how your emails are performing.
Without DMARC, you can’t see who’s sending from your domain or stop others from spoofing it. You also won’t know if SPF or DKIM are failing, which means deliverability issues can go completely unnoticed.
Before you touch any DNS settings, take a minute to list all the platforms that send email using your domain. This includes tools like:
Google Workspace (Gmail): day-to-day emails
Outlook/Office365: internal or transactional emails
Brevo (formerly Sendinblue): newsletters or campaigns
Mailgun, Amazon SES, SendGrid: automated or app-triggered emails
Any CRM, cold email tool, or SMTP service (even if MailReach triggers it)
Step 2: Access Your Domain’s DNS Settings
Now that you know which providers you’re using, it’s time to update your domain’s DNS records.
To get started:
1. Log in to your domain registrar or DNS host. This is the company where you bought or manage your domain, like:
GoDaddy
Namecheap
Google Domains
Cloudflare
Bluehost
OVH
Hostinger
2. Find your DNS settings.
The menu name varies, but look for something like:
“DNS Settings”
“Manage DNS”
“DNS Zone Editor”
“Advanced DNS”
3. Choose the domain you want to edit. If you have multiple domains, make sure you’re working on the right one—the one your emails are actually sent from.
Call out: 💡 You don’t need to understand everything in this section, just how to add a TXT record. That’s all SPF, DKIM, and DMARC need.
Tip: If you’re not sure where to find this, just search:
How to access DNS settings on [your registrar name]
Most registrars have simple help docs or dashboards with direct DNS links.
Step 3: Set Up SPF
Start by logging into your domain registrar or DNS hosting account, wherever you manage your DNS records (like GoDaddy, Cloudflare, or Namecheap). Look for a section called “DNS Settings” or “Zone Editor.”
If your domain already has an SPF record, it’ll show up as a TXT record starting with v=spf1. If it doesn’t, you’ll create a new one.
Let’s say you use Google Workspace and SendGrid. You’d add a single SPF record like this:
Only one SPF record is allowed per domain. If you use more than one email tool, combine all the include: entries into a single line, don’t create separate records.
After saving the changes, it can take a few minutes to a few hours to go live. To be safe, allow up to 48 hours for full DNS propagation.
Once done, use MailReach’s SPF Checker to confirm it’s set up correctly. It’ll flag any issues like syntax errors or too many lookups, so you can fix them before they affect deliverability.
Step 4: Add DKIM.
To set it up:
Generate your DKIM key pair from your email platform’s admin panel (e.g., Google Workspace, Zoho, Outlook). Look for a section called “Email Authentication” or “DKIM Settings.” The private key stays with your provider and signs each outgoing email.
Copy the public key and selector given by your platform. These are used to create the DNS record.
Add a TXT record to your domain’s DNS settings.
Format example:
Name: default._domainkey.yourdomain.com
Value: v=DKIM1; k=rsa; p=yourPublicKeyHere
Paste it exactly as provided. Even small formatting errors like line breaks or missing characters can prevent DKIM from working.
Save and wait for DNS changes to propagate. It can take anywhere from a few minutes to 48 hours.
To confirm everything is working, run a test using MailReach’s free DKIM Checker. This will verify whether your domain is correctly signing outgoing emails.
Can you have Multiple DKIM records?
Yes. If you send emails from multiple providers (for example, Gmail for internal communication and SendGrid for outbound campaigns), you’ll need to create a separate DKIM record for each provider.
Each email service generates its own selector and public key, which must be added to your domain’s DNS. These selectors help mailbox providers know which key to use when verifying a message’s signature. This is an important distinction from SPF:
SPF: One record per domain (with all providers listed in a single record)
DKIM: One record per sending provider (each with a unique selector and key)
Step 5: Implement DMARC
Start with a “monitor-only” policy so you can test without affecting deliverability:
→ p=none lets you receive reports without blocking any emails.
Log in to your DNS provider and add a new TXT record. Format example: → Name: _dmarc.yourdomain.com → Value: v=DMARC1; p=none; rua=mailto:dmarc-reports@yourdomain.com
Use a valid email address in the rua field to receive DMARC reports. This inbox should be able to handle large XML attachments.
Save and wait for DNS propagation. Most changes take effect in under 24 hours, but some providers may take up to 48.
Review the incoming DMARC reports after 24–48 hours. They’ll show whether your SPF and DKIM are passing, which tools are sending from your domain, and if anything looks suspicious.
Once you’re confident SPF and DKIM are consistently passing, you can gradually change your policy to:
Even a perfectly written record can fail if it’s misconfigured. SPF, DKIM, and DMARC all rely on precise DNS entries, consistent domain alignment, and correct sending behavior. A single error in any one of them can quietly tank your deliverability without warning.
Let’s break down the top setup mistakes by protocol and how to spot them early.
Common SPF Email Authentication Setup Errors
Too many DNS lookups SPF only allows 10 DNS lookups per record. Every include, a, or mx counts toward this limit. Cross the limit, and your record is skipped entirely.
Multiple SPF records You can only have one SPF record per domain. If you publish more than one, both will fail. Merge all entries into a single, properly structured record.
Missing sending platform If your email platform (e.g., CRM, cold outreach tool) isn’t explicitly listed in the SPF record, those emails may fail silently. Add the correct include: for each tool, check their docs for specifics.
Jumping to -all too early A hard fail (-all) tells inbox providers to reject all unauthorized senders. Sounds secure, but if you haven’t validated everything yet, you could block legitimate emails.. Use ~all (soft fail) during testing to avoid accidents.
MailReach’s SPF Checker helps you validate your includes, monitor lookup counts, and catch silent failures before they happen.
Common DKIM Email Authentication Setup Errors
Incorrect TXT record name The DKIM selector format must be exact: default._domainkey.yourdomain.com Even a single typo, missing dot, or incorrect prefix will break it.
Broken public key formatting Some providers deliver the public key in chunks. If you misplace whitespace or line breaks while copying, mailbox providers won’t be able to parse it.
Forgetting to enable signing Even with the correct DNS record, your emails won’t be signed unless DKIM is actively turned on inside your email platform. This is often a hidden toggle in admin settings.
Reusing selectors If two tools (like SendGrid and HubSpot) use the same selector name (e.g., default), their records can overwrite each other. This causes silent failures, especially when using multiple sending platforms.
Use unique selectors for each tool, and follow provider-specific instructions.
What MailReach’s DKIM Checker Does: It verifies whether your emails are being signed with a valid DKIM key, checks if the record is properly configured in DNS, and highlights misalignment issues that could cause
spam filtering
.
Common DMARC Email Authentication Setup Errors
SPF and DKIM aren’t aligned DMARC only passes if SPF or DKIM succeed AND the sending domain matches the one in your From: address. If your platform uses its own domain (like @mail.sendgrid.com), even valid SPF/DKIM won’t count.
Starting with a strict policy Launching with p=reject before your records are stable is risky. You could block legit emails without realizing it. Start with p=none to monitor safely. Move to quarantine or reject only once you're confident everything is aligned.
Ignoring aggregate reports(rua) Many teams set up DMARC reports but never look at them. That’s a missed opportunity to catch spoofing, alignment failures, or sender misconfigurations. Set up a DMARC report analyzer and review reports weekly, especially after changing senders or email tools.
Syntax mistakes in the TXT record DMARC tags are sensitive. One misplaced colon, semicolon, or equals sign — like aspf: r instead of aspf=r — can invalidate your whole policy.
Quick check: Use the
DMARC Monitor
tool to receive and visualize alignment reports, misconfigurations, and spoofing alerts in real time.
How to Debug Your Email Authentication Setup
If your emails are hitting spam, failing to send, or showing SPF/DKIM/DMARC errors, here’s how to debug the setup with confidence:
Send a test email from your live tool Send a message to a Gmail inbox. Open it, click the three-dot menu, and choose “Show Original.”
You’ll see a report like: spf=pass, dkim=fail, dmarc=fail
This helps you pinpoint which protocol is failing.
Run diagnostic checks using real data Use email authentication tools to validate your setup from the inbox's point of view:
Use MailReach’s SPF Checker to confirm includes, syntax, and lookup limits.
Use MailReach’s DKIM Checker to see if outgoing messages are signed and matched.
Use DMARC monitoring tools to validate domain alignment and inspect failure patterns.
Inspect your domain alignment Make sure the domain in your Return-Path, From:, and DKIM signature all match. If they don’t, even valid records will fail DMARC.
Monitor continuously One-off tests aren’t enough. A small DNS change or a new tool can quietly break authentication. MailReach flags drift, spoofing, and silent failures early to help you stay ahead of deliverability issues.
Managing multiple inboxes? MailReach email warmup simulates real inbox activity to protect your sender reputation.
How MailReach Simplifies Email Authentication (Without the Headaches)
You don’t need to be a DNS expert to stay out of spam. MailReach helps you validate your setup, monitor your sender reputation, and catch silent failures early, across all your sending inboxes.
Here’s how it helps at every stage:
SPF & DKIM Visibility: MailReach’s warmup dashboard detects SPF or DKIM failures in real-world sending conditions. Helps you avoid guesswork or digging through DNS logs.
DMARC Failure Detection: While not a DMARC monitoring tool, MailReach flags when your emails fail DMARC checks during warmup or spam tests, helping you take action before deliverability drops.
Warmup That Builds Trust: MailReach sends realistic, human-like interactions between Gmail and Outlook inboxes: replying, forwarding, and archiving emails to help rebuild or boost your domain reputation. At the same time, it confirms whether your SPF, DKIM, and DMARC setups are actually working.
Spam Test with Auth Diagnostics: Send your actual campaign email through MailReach’s Spam Test to check where it lands—Inbox, Promotions, or Spam—on 30+ providers. You’ll also get visibility into which authentication checks passed or failed and why.
API for Scale: For teams managing dozens of senders, MailReach’s Warmup API lets you automate authentication checks, warmups, and alerts from your backend.
Ready to stop guessing and start inboxing?
Try MailReach and take control of your email deliverability with the only warmup tool built for real-world B2B & B2C emailers.
FAQs
What if I only set up SPF or DKIM?
You’ll still pass DMARC if either SPF or DKIM is valid and aligned with your From domain. But relying on just one leaves gaps. If SPF fails due to a forwarding issue, DKIM can serve as your fallback. Setting up both ensures more reliable authentication and fewer deliverability risks.
How soon do DMARC reports come in?
DMARC aggregate reports typically start arriving within 24 hours of publishing your record. These are sent daily by major mailbox providers and include summaries of which sources passed or failed SPF and DKIM. You’ll get the most insight after a few days of sending consistent emails.
How important is the authentication process in email marketing?
It’s critical. Email authentication is the foundation of trust between your domain and inbox providers. Without it, your emails are more likely to land in spam, get blocked, or be spoofed by bad actors.
Proper SPF, DKIM, and DMARC setup is what separates a reliable sender from a suspicious one in the eyes of Gmail, Outlook, and others.
What does it mean when an email is not authenticated?
An unauthenticated email lacks proper verification through SPF, DKIM, or DMARC. Inbox providers can’t confirm if it came from your domain or if it was tampered with during delivery. Such an email is more likely to be marked as spam, flagged as suspicious, or rejected entirely.
Deliverability issues are expensive. Fix them fast.
Every email in spam equals to a lost potential customer. Start improving your inbox placement today with MailReach spam testing and warmup.
Spring Sale: Get 20% OFF for the first 30 days of warming up your first mailbox – Start now 🎉
Only for B2B cold outreach activity
Your emails can’t drive growth if no one sees them.
Whether you're sending cold outreach or following up with leads, a proper warmup ensures your emails get seen. Make sure your best campaigns don’t go to waste.
Your B2B cold emails deserve great deliverability.
Following the rules isn’t enough—know where your emails land and what’s holding them back. Check your spam score with our free test, and improve deliverability with MailReach warmup.

 Email Deliverability